iRedMail - How to Set Up Android for use with your eXp Email Account (International Agents Only)
To setup your eXp email for use with Android OS devices please follow the steps provided below.
1. Open the Gmail app on your Android device.2. After opening the app, you'll need to tap the profile icon on the top right of the screen.3. From the profile selection screen choose the option to "Add another account"4. When selecting what type of email account to setup, choose "other" from the available options.5. You'll be prompted to add your email address as shown below. Once you've entered your full email address in the field select "manual setup" at the bottom left of the screen.6. On the following screen choose Personal (IMAP) for the account type.7. Next enter your eXp email account password. Once you've done that click NEXT.
If you are unsure of the correct password for your eXp email account it's often best to attempt manually logging in on the website at https://mail.expglobal.partners to ensure you are using the correct password for the setup. If you can login on the website then the password used there will be the correct one you'll use for the app. If you determine you need help with recovering your eXp email account password please reach out to eXp Technical Support anytime at support@exprealty.com for further assistance.8. After entering your password you'll be brought to the Incoming Server Settings screen. Here you'll initially see the incorrect server name has been entered automatically. You'll need to tap the Server field and instead enter mail.expglobal.partners there, then tap NEXT. The app will confirm the connection to your incoming email server.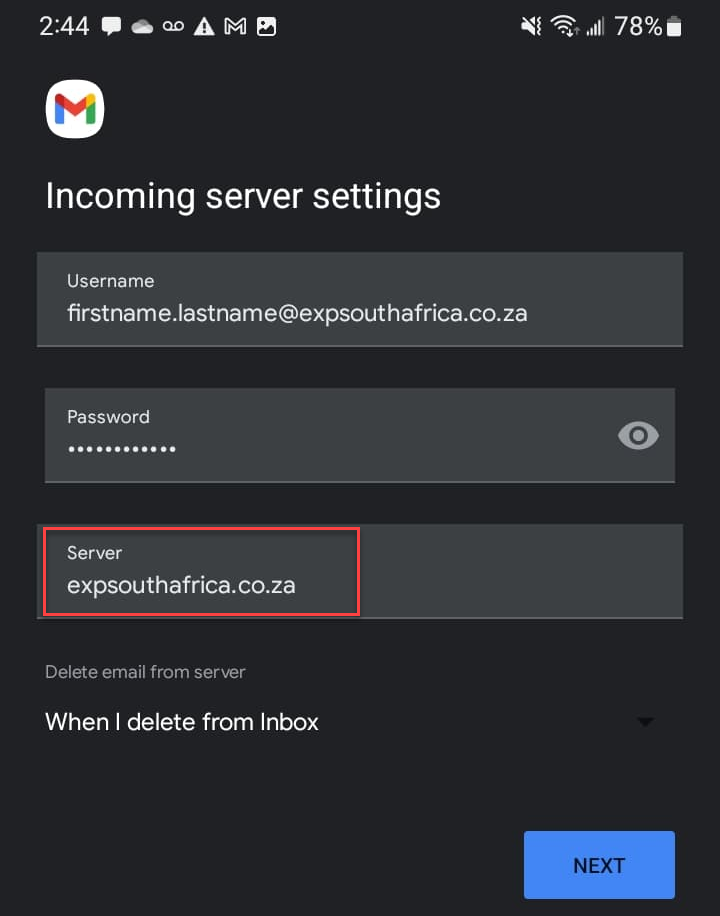
9. After confirming the connection to your Incoming Server the Outcoming Server Settings screen will appear. You'll need to repeat the same steps as done previously with the incoming server. The app will automatically enter the incorrect server name in the SMTP Server field. Tap the SMTP Server field, replace the incorrect entry with mail.expglobal.partners and then click NEXT to confirm the Outgoing Server Settings.
10. Once your Outgoing Server Settings have been confirmed the Account Options screen will appear. You can leave all options checked and tap the Sync Frequency field if you prefer to have a longer time period than 15 minutes for battery conservation. Once done here you can click NEXT to proceed.
11. Lastly you'll want to enter your name as it should appear on the header for recipients of your emails. If your name is not already entered in the field titled "Your Name" simply give it a tap, enter your name appropriately and give the NEXT button a quick tap to finalize the setup of your eXp email account.
12. Once setup is complete you'll be brought back to the inbox for you originally selected account. Once here you'll want to tap your profile icon as done before to enter the account selection screen.
13. Now when entering the account selection screen you should find your eXp email account listed in the options for connected accounts. From here you can tap the account you'd like to view the inbox for. Tap your eXp email account to view the associated emails.
14. Congratulations! You can now manage your eXp email from your Android device.

If you issues with getting email setup on your Android device after following the above steps you can reach out to eXp Technical Support for assistance anytime between Sunday 6pm ET - Friday 8pm ET at support@exprealty.com.
Related Articles
iRedMail - How to Access your eXp Global Email from an iOS Device (International Agents Only)
To setup your eXp email for use with iOS devices please follow the steps provided below. 1. On your iOS device enter your settings by tapping on the Settings icon. 2. From here you'll scrool down and select the Mail. 3. From Mail settings you'll need ...iRedMail - Send Emails with your eXp email account from Gmail (International Agents Only)
Please note this setup is only for use on PCs when sending email through the gmail.com website. This article will walk you through setting up the 'Send As' feature and adding your eXp email smtp server settings to your GMail account. Once you ...Zoho Mail - Setting Up Email Forwarding (International Agents Only)
The instructions in this article are for international eXp Agents who's email accounts are on the Zoho Mail platform. To see if your account is on the Zoho Mail platform, you can log into your Okta account at https://exprealty.okta.com to verify if a ...Zoho Mail - Adding a Signature to your eXp Email (International Agents Only)
The instructions in this article are for international eXp Agents who's email accounts are on the Zoho Mail platform. To see if your account is on the Zoho Mail platform, you can log into your Okta account at https://exprealty.okta.com to verify if a ...Moving Contacts from iRedMail to Zoho Mail (International Agents Only)
This doc explains how to export contacts stored on the eXp iRedMail server into a VCF file and import into Zoho Mail. Once contacts have been exported you can use the VCF file to import into your preffered email client or directly into the Zoho Mail ...